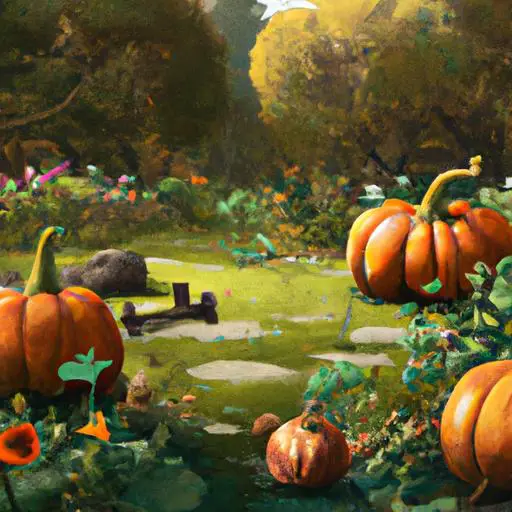
The fall season is here, and with it comes the fun of pumpkin carving.
But what happens when your pumpkin is broken? Don’t despair – there are plenty of options available to you for fixing your broken pumpkin! In this article, we’ll explore the different techniques you can use to fix a broken pumpkin, so you can get back to enjoying your autumn season.
Read on to find out how you can make your pumpkin perfect again!
Table of Contents
How Do You Fix A Broken Pumpkin?
If your pumpkin has broken, don’t despair! There are a variety of ways you can fix it, depending on the severity of the damage.
For smaller breaks, you can use a waterproof adhesive, such as epoxy or super glue, or craft glue like Mod Podge.
For larger breaks, you might need to use a patch, such as a piece of cloth or paper, or even a piece of another pumpkin.
If needed, you can also use a combination of glue and thin wire, such as florist wire, to wrap around the pieces and hold them together.
With a little creativity, you can restore your pumpkin to its previous condition.
How Do You Repair A Busted Pumpkin?

Repairing a damaged pumpkin is not a straightforward task, but it can be done with the right steps.
Gather the necessary supplies – a sharp knife, a spoon, tape, a permanent marker, and some masking tape.
Then, carefully remove any broken or rotten pieces of the pumpkin using the knife and spoon.
After that, draw a line around the area that needs to be patched using the permanent marker.
Cut the masking tape to fit, then apply it to the pumpkin.
Secure the patch with tape, wrapping it around the entire area.
You may need additional pieces of tape to reinforce the patch.
Finally, you can decorate or carve the pumpkin as you normally would.
With a bit of patience, it’s easy to repair a busted pumpkin.
How Do You Seal A Cracked Pumpkin?
If you have a cracked pumpkin, don’t worry there are several ways to seal it.
The most obvious method is to use tape or glue, however, this isn’t the best solution if you plan on eating it or using it for a carving project.
In this case, it’s best to use a food-safe sealant.
Start by cleaning the cracked area with a damp cloth and allowing it to dry completely.
Then, use a brush to apply a thin layer of melted paraffin wax to the crack.
Paraffin wax is a food-safe sealant that can be used to fix cracks in vegetables and fruits.
Let the wax dry, and then apply a second layer.
If you don’t have access to paraffin wax, you can also use a combination of beeswax and olive oil.
Heat the beeswax until it melts and then mix it with the olive oil.
Use a brush to apply the mixture to the cracked area and let it dry.
Lastly, if you want to keep the pumpkin for decoration, you can use a hot glue gun to seal the crack.
Note that hot glue isn’t food-safe, so it should only be used for decorative purposes.
It’s important to remember that the crack won’t be completely gone, the sealant will only help prevent it from getting larger.
So, handle the pumpkin with care and take extra precautions if you plan to eat it.
Can You Glue A Pumpkin Stem Back On?
Gluing a pumpkin stem back on is simple.
To start, you’ll need rubbing alcohol, a cotton swab, Elmer’s glue, a paper towel, and tweezers.
Begin by cleaning the pumpkin stem and the pumpkin’s stemless area with the rubbing alcohol and cotton swab.
This will help the glue stick better.
Then, spread a thin layer of Elmer’s glue on the stem and the pumpkin where it was removed.
Put the stem back on the pumpkin and press it firmly for about a minute.
Use the tweezers to correctly position the stem.
Wipe away any excess glue with the paper towel.
Let the glue dry completely before displaying or carving the pumpkin.
Depending on the glue, this could take several hours to several days.
If you can, waterproof the pumpkin stem after it has been glued on with a spray sealant or clear nail polish.
To prevent the glue from coming off, try to handle the pumpkin stem as little as possible.
In conclusion, gluing a pumpkin stem back on is easy.
With the right supplies and patience, you can repair a pumpkin with a missing stem.
Does Super Glue Work On Pumpkins?

Super glue is a powerful adhesive, but it won’t stick to pumpkins.
This is because pumpkins have a very porous surface that doesn’t hold the adhesive well.
Moreover, super glue is a synthetic material that can be toxic if consumed and pumpkins are often carved and eaten.
But there is an alternative adhesive that works well on pumpkins.
It’s called hot glue, and it’s a thermoplastic that melts when heated.
Hot glue is the best choice for pumpkin projects because it quickly adheres to the pumpkin’s porous surface and dries quickly.
Plus, it’s non-toxic, so it’s safe for food-related projects.
In summary, super glue is not suitable for use on pumpkins, but hot glue is an effective and safe alternative.
Hot glue is ideal for pumpkin projects as it adheres to the pumpkin’s porous surface, dries quickly, and is non-toxic.
What Does Vaseline Do To Pumpkins?
Vaseline is an effective way to preserve pumpkins and keep them looking fresh for longer.
Just apply a thin layer of petroleum jelly to the outside of the pumpkin to seal in moisture and prevent it from drying out.
This reduces the risk of cracking or shriveling, and also acts as a barrier to dirt and other contaminants.
Professional pumpkin carvers often use Vaseline to create a smoother, shinier finish and protect the pumpkin from the elements.
The Vaseline acts as a sealant, preventing the pumpkin from becoming waterlogged or moldy.
It can also be used to create unique designs and patterns on the pumpkin.
Simply mix Vaseline with food coloring and apply it to the pumpkin for a unique, eye-catching look.
In conclusion, Vaseline is a great way to preserve pumpkins and create a unique look.
It seals in moisture, protects the pumpkin from the elements, and also provides a smooth, shiny finish.
Plus, with Vaseline and food coloring, you can make your pumpkin carving stand out from the rest.
Why Did My Pumpkin Burst?
Pumpkins are often associated with fall and the holidays, and have a variety of uses, such as carving, baking, and more.
However, they can also be a source of disappointment if they burst.
There are several reasons why a pumpkin might burst.
Water damage can cause a pumpkin to expand and burst if it is exposed to too much moisture or humidity.
Similarly, high temperatures can cause the pumpkin to expand and burst.
Lastly, natural decay can occur over time, making the pumpkin soft and eventually burst.
To avoid pumpkin bursts in the future, store them in a cool and dry place, inspect them for any soft spots or discoloration before purchasing, and use them soon after purchasing.
Following these tips can help you enjoy your pumpkin without it bursting.
How Do You Preserve A Cut Open Pumpkin?

Preserving a cut open pumpkin is easy if you keep it as dry as possible.
Start by cutting away any soft or bad spots and use a wet cloth to clean off the outside of the pumpkin.
This will help remove bacteria or mold that could grow on it.
Then, use a towel to pat the pumpkin dry and let it sit in a warm, dry spot for several hours.
Once the pumpkin is dry, consider painting it with a sealant or coating it with a wax or varnish to protect it from moisture.
Finally, store the pumpkin in a cool, dry place, away from direct sunlight.
If possible, put it in a plastic bag and store it in the refrigerator to help keep it from spoiling.
By following these steps, you can keep your cut open pumpkin fresh and preserved for longer.
With a bit of effort, you can enjoy your pumpkin for months to come!
How Do You Treat A Split Pumpkin Stem?
If your pumpkin stem has split, you need to act fast to save it.
Fortunately, there are some easy methods to treat the split stem and heal it.
First, take a look at the damage and remove any parts that are obviously dead or dying.
Then, use a damp cloth or sponge with warm water and some mild soap to clean the wound and remove dirt, debris, and other microorganisms that may cause further damage.
Using a sharp knife or scissors, make a V-shaped cut around the split.
Make sure it’s no more than one inch deep.
This will open up the wound and help it heal.
Next, apply a fungicide or antifungal agent to the stem.
This is important to prevent mold from growing and causing further damage.
You can find these products at most garden centers or online.
Finally, cover the wound with plastic wrap and secure it with tape or a rubber band.
This will keep the wound clean and make sure no further damage is done.
By following these steps, you can treat a split pumpkin stem and save your pumpkin.
With proper care and attention, it should heal and you can enjoy it for many seasons to come.
Can You Flex Seal A Pumpkin?
Flex Seal can be a great tool for a variety of projects, but it’s not the best choice for sealing a pumpkin.
While it may seem like an easy solution, the chemical composition of Flex Seal isn’t designed to stand up against the elements that a pumpkin is exposed to.
The main problem with using Flex Seal on a pumpkin is that it isn’t designed for long-term sealing.
The product is designed to form a seal that will only last a few months.
So, the seal created using Flex Seal won’t be able to withstand rain, wind, and UV rays for extended periods of time.
Additionally, using Flex Seal on a pumpkin could cause damage to its outer skin.
This sticky product may discolor or even rot the pumpkin’s skin over time.
The chemical composition of Flex Seal can also harm the pumpkin’s inner flesh, resulting in a decrease in freshness.
For these reasons, it is not recommended to use Flex Seal on a pumpkin to keep it fresh.
Instead, you should use a natural sealant, such as beeswax or petroleum jelly, to help protect the pumpkin from the elements.
This will help keep the pumpkin fresh for a longer period of time without causing any damage.
Final Thoughts
Now that you know how to fix a broken pumpkin, it’s time to put your newfound knowledge to the test! Grab your supplies, find a broken pumpkin, and get to work.
With the right tools and techniques, you’ll be able to fix your pumpkin in no time.
So go ahead and get creative – your perfect pumpkin awaits!