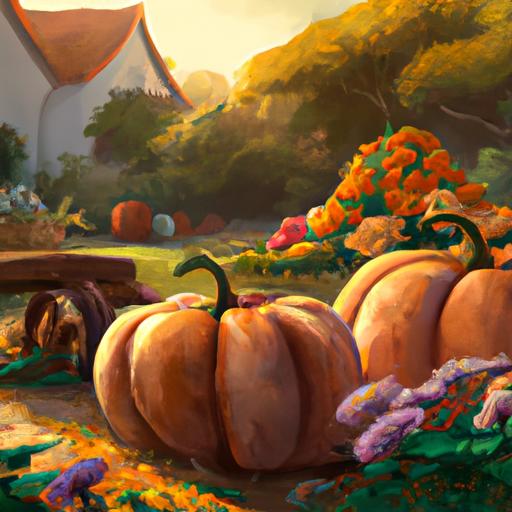
With Halloween just around the corner, it’s time to break out those pumpkins and get to carving! But if you’re looking to take your jack-o-lantern game to the next level, why not try using a stencil? In this step-by-step guide, we’ll walk you through how to use a stencil to carve pumpkins and make sure your pumpkin carving looks like a masterpiece.
So, grab your stencils and pumpkins and let’s get started!
Table of Contents
How To Use A Stencil To Carve Pumpkins?
Carving pumpkins for Halloween can be a great way to get creative and have fun! One of the most popular ways to do this is by using a stencil.
Stencils are templates that you can trace onto a pumpkin before you start carving to make sure you get the details of the design just right.
To use a stencil, start by picking out the design you want and affixing it to the pumpkin.
Make sure its straight and secure.
Then, trace the design onto the pumpkin using a marker or crayon.
Once youve finished tracing, remove the stencil and get ready to carve.
Using a sharp knife, cut out the design slowly and steadily, keeping within the lines.
The deeper you cut, the more visible the design will be.
When youre done carving, remove the cut pieces to reveal your masterpiece!
To finish, add a light source to your pumpkin – either a battery-powered candle or a flashlight placed in the center of the pumpkin will make the design stand out.
Just be careful when youre using a knife and keep the light source away from any flammable materials.
Now have fun and happy carving!
What Is The Easiest Way To Transfer A Stencil To A Pumpkin?

Transferring a stencil to a pumpkin is easy when you have a dry erase marker and a piece of paper.
Start by printing out the stencil in the size you want it to be on the pumpkin.
Then, place it on the pumpkin and secure it with tape.
Trace the outline of the stencil onto the pumpkin with the dry erase marker to create a faint outline.
Carefully remove the stencil and carve out the shape using a pumpkin carving tool or a sharp knife.
Afterwards, the dry erase marker can be easily wiped off with a damp cloth.
This method is simple and effective, ensuring you don’t make any mistakes or get ink on the pumpkin.
Do You Cut The Black Or White Of Pumpkin Stencil?
When it comes to cutting a pumpkin stencil, its essential to understand the details of the process to get the desired result.
The white part of the stencil is the most important to cut out, as it will be where the design is exposed once cut away from the pumpkin.
You may need to cut multiple times to achieve the desired effect.
The black of the stencil is also essential, but not in the same way.
Instead, you should use a marker or pencil to trace the black parts of the stencil so that you know which parts of the pumpkin should remain untouched.
Remember that both the white and black of a pumpkin stencil are important for the desired result.
With the right technique and patience, you can create beautiful and unique pumpkin designs this Halloween season!
What Part Of The Pumpkin Stencil Do You Cut?
When crafting a pumpkin stencil, you need to first decide on your desired design.
Then, cut out the area of the stencil that is not part of the design.
For instance, if the design is a cat, cut out the area around the cat.
To ensure a clean cut and avoid tearing the stencil, use a sharp object such as an X-Acto knife for paper stencils and a pair of scissors for plastic material.
Furthermore, make sure that the cuts are precise and that the design is facing the right way when transferring it onto the pumpkin.
Once the stencil is in place, you are ready to begin carving the design.
Mark the pumpkin where the design should go to ensure it is in the right spot.
Do Stencils Work On Pumpkins?

Stencils are a great way to add intricate details and create amazing designs on pumpkins.
Before applying the stencil, make sure the pumpkin is clean and dry.
You can use a stencil brush, foam brush, paintbrush (with light pressure), paint pen, or marker to apply the stencil.
Once in place, you can use acrylic paints, markers, or even glitter to create your design.
When finished, remove the stencil and admire your work.
If desired, you can apply a clear sealant or spray to help preserve the design.
With a bit of patience and creativity, you can create amazing pumpkin designs that will impress everyone who sees them.
What Is The Trick To Using Stencils?
Stenciling can be a great way to add a professional and polished finish to your projects.
To make sure your design turns out looking perfect, it’s important to have a plan and practice before you start.
Begin by deciding on the size of the stencil you need and what your finished product should look like.
If you’re a beginner, start with a smaller project or simpler design.
Next, plan out the stencil itself.
Depending on the design, you may need one large stencil, multiple smaller ones, or a combination of both.
To ensure the stencils are properly aligned, draw a guideline across the surface you’re stenciling with a ruler or other straight edge.
Once your plan and stencils are ready, practice! Begin by stenciling on a piece of paper or cardboard to get a feel for the shape of the stencil and how it works with your design.
As you practice, pay attention to the amount of pressure you’re applying to the stencil and the speed at which you’re moving it.
These will help you get an even and consistent finish.
Finally, make sure you have enough time and patience when starting the real project.
Stenciling can be time consuming, so be sure to have the necessary resources to complete the job.
If you’re feeling overwhelmed or rushed, take a break and come back to it later.
By following these steps, you’ll be able to create beautiful designs with stencils.
With a little bit of planning and practice, you can make sure your stenciling project turns out looking professional and polished.
How To Do A Stencil Without Bleeding?
Creating a stencil without any paint bleeding requires the right technique and supplies.
Start by choosing a good quality stencil material like Mylar or adhesive-backed vinyl.
Make sure the material is thick enough to prevent any paint from seeping through.
Then, prepare the surface you are stenciling on, removing any dirt, debris, and oils.
If painting on a flat surface, lightly sand it to create a smooth surface.
Next, secure the stencil in place with a low-tack spray adhesive.
This will keep it from moving while you are applying the paint, preventing any bleeding.
Use a stencil brush or roller to apply the paint in a light, even coat.
This will help create a crisp, clean line.
With patience and the right technique, you’ll be able to create a beautiful piece of art that will last for years.
How Do You Transfer A Drawing To A Pumpkin To Paint?

Transferring a drawing to a pumpkin is an easy task that requires just a few materials and a bit of patience.
You’ll need tracing paper, a pencil or pen, an eraser, and a pumpkin.
To begin, sketch your design on the tracing paper.
This will be the template you transfer to the pumpkin.
Place the tracing paper on the pumpkin, making sure it’s properly aligned, and trace over the design with the pencil or pen.
Press firmly for a clean, clear transfer, and use the eraser to clean up any excess marks.
When you’re ready to paint, lightly sand the pumpkin to give it a smooth surface, which will help the paint adhere better.
Use a light hand and few layers, allowing each layer to dry before applying the next.
With a few simple steps and some patience, you can easily create a beautiful pumpkin design to enjoy this season.
How Do You Transfer A Picture Onto A Pumpkin?
Transform an ordinary pumpkin into a work of art with a few simple supplies and a bit of creativity! Transferring a picture onto a pumpkin is a great way to create a unique decoration.
To start, choose a picture, print it out on a regular sheet of printer paper, and make sure it’s the size you want it to be on the pumpkin.
Apply a layer of Mod Podge to both the pumpkin and the printed image, and let it dry.
Then, place the image face down onto the pumpkin and press firmly.
Use a damp cloth to rub away the paper, leaving the image on the pumpkin.
Finally, seal the image with a layer of Mod Podge and let it dry before displaying your finished pumpkin.
With just a few steps, you can easily create a one-of-a-kind decoration for your home.
What Is The Best Transfer Paper For Pumpkins?
When transferring images onto pumpkins, laser printer transfer paper is the best option. Specifically designed for various substrates, this type of transfer paper produces vibrant and professional-quality results. The process is simple: first, print the desired image onto the paper using a laser printer, then use a heat press or iron to transfer the image onto the pumpkin. As you do so, remember to use a clean and dry pumpkin, and ensure the transfer paper is thin enough to avoid distortion. Finally, make sure to apply the heat evenly and for the correct amount of time for a flawless result. With laser printer transfer paper, you can easily create a beautiful image on your pumpkin.
Can I Use Vaseline To Transfer Stencil?

Vaseline is an ideal choice for transferring stencils because of its versatility and affordability.
Simply apply a thin layer of the petroleum jelly-based product to the back of the stencil, and then place it onto the surface you’re transferring it to.
The Vaseline creates a barrier, allowing you to move the stencil without it sticking to the surface.
When you have it in the desired position, simply remove the Vaseline and the stencil will stay in place.
However, it’s important to apply the Vaseline evenly to the back of the stencil, as an uneven application could cause the stencil to move or shift.
Additionally, make sure to use only a thin layer of Vaseline, as too much could cause the stencil to stick to the surface, making it difficult to remove.
Using Vaseline to transfer stencils is an effective and easy method.
Just be sure to apply it evenly and in a thin layer for the best results.
Final Thoughts
Now that you know how to use a stencil to carve pumpkins, it’s time to put your newfound skills to the test! Get creative with your stencil designs and have fun carving your pumpkins.
You can even use a combination of stencils and freehand carving to create unique designs.
With a little bit of practice, your pumpkin carving will be the talk of the town!