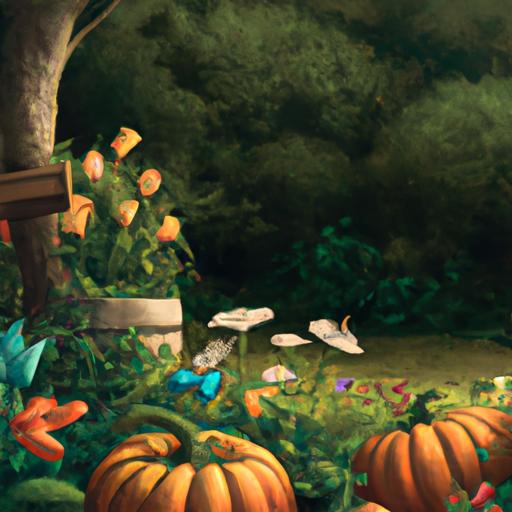
Are you looking to craft creatively this fall? When you think of pumpkin carving, do you want to do something a bit more unique than the traditional carving? Painting pumpkins is a great way to add a touch of creativity to your pumpkin decorating, but what kind of paint should you use? Look no furtherweve got all the answers you need in this guide to painting pumpkins.
From what type of paint to use to helpful tips for success, youll find everything you need to create beautiful painted pumpkins that will be the envy of your neighborhood.
Table of Contents
What Paint Do You Use To Paint Pumpkins?
When it comes to painting pumpkins, there are plenty of options to choose from.
Depending on the look you want and how long you want it to last, you can opt for acrylic or craft paint, spray paint, oil-based paint, or glow-in-the-dark paint.
Acrylic paint is great for temporary decorations and is easy to use, non-toxic, and comes in a variety of colors.
However, it’s not waterproof, so it won’t last outdoors for long.
Spray paint is a good choice for outdoor decorations as it is waterproof and also comes in a variety of colors.
Oil-based paint is great for creating a glossy finish, but is not recommended for use on pumpkins as it can be hazardous.
Glow-in-the-dark paint is perfect for creating a spooky effect in the dark and will last for several months.
To get the best finish, apply a few coats of paint and make sure each coat has completely dried before adding the next.
With the right type of paint, you can create a beautiful and unique pumpkin that will last for years to come.
How Do You Get Paint To Stay On Pumpkins?

When it comes to making your pumpkin paintings last, you need to take a few extra steps.
Start by selecting the right kind of paint.
Acrylic paint is the best option as it won’t chip or crack.
If you are using a spray paint, make sure to choose one specifically designed for outdoor use.
Next, prepare the pumpkin for painting.
Start by washing it with a mild soap and warm water to remove any dirt or debris.
Then, use a damp cloth to dry it off.
Once the pumpkin is clean and dry, it’s time to apply the paint.
Apply thin layers to ensure the paint won’t crack or peel off.
Allow each layer to dry before adding the next.
When you’re done, finish it off with a clear sealant to protect the paint from the elements and help it last longer.
Finally, store the pumpkin in a cool, dry place away from direct sunlight and high humidity.
With proper preparation and care, your pumpkin paintings will look great and last through the fall season.
How Do You Seal Acrylic Paint On A Pumpkin?
Sealing acrylic paint on a pumpkin is essential for creating a beautiful and lasting decoration.
Acrylic paint is a great choice because it can withstand the elements and won’t chip or peel off easily.
To seal it, you’ll need to use a clear acrylic sealer.
The best way to seal the paint is with an aerosol sealer.
Shake the can vigorously before use, then spray the sealer onto the pumpkin in light, even coats.
Allow the sealer to dry completely, which may take up to 24 hours depending on the climate and humidity.
When finished, your painted pumpkin should look professional and last for years.
The sealer will not only protect the paint, but also give the pumpkin a glossy finish.
Be sure not to apply too much sealer as it can cause the paint to bubble or flake off.
Refer to the instructions on the can if unsure of how much to use.
By following these steps, you can create a beautiful, long-lasting painted pumpkin.
Happy pumpkin painting!
Do You Need To Prime A Pumpkin Before Painting?
Painting a pumpkin is a great way to create a festive display, but don’t forget one important step – priming! Priming ensures that the paint adheres to the pumpkin properly and prevents it from cracking, chipping, or fading due to weather or other environmental factors.
To prime your pumpkin, start by cleaning it with a mild detergent and water to remove any dirt or dust.
After the pumpkin is dry, apply a thin coat of primer to the entire surface and allow it to dry completely before applying the paint.
This will help the paint adhere better and create a uniform look.
When it comes to choosing the right paint, acrylic or latex paint is the best option as it is water-based and durable.
Oil-based paints may cause the pumpkin to rot over time, so avoid using them.
By taking the time to properly prime your pumpkin before painting it, you will achieve a high-quality, long-lasting paint job.
Does All Paint Work On Pumpkins?

Painting pumpkins can be a fun and creative activity, but it’s important to consider the type of paint you use and the surface of the pumpkin.
Acrylic paint is the best option for painting pumpkins and it is best to use a primer or sealer before applying it.
Acrylic paint is easy to find and it adheres well to the pumpkin’s surface, and it is also water-resistant and will not easily chip or flake off.
Latex paint can also be used for painting pumpkins.
It is easy to work with and water-based, so it is easy to clean up.
However, it is not as durable as acrylic paint and not recommended for outdoor use.
Oil-based paints and spray paint should be avoided.
These paints contain harsh chemicals and solvents that can damage the pumpkin’s surface and make it difficult to clean up.
Why Wont My Paint Stick To My Pumpkin?
Pumpkins can be a tricky surface to paint on due to their smooth, slippery exterior.
For paint to stick, you need to create a tooth or texture on the pumpkin for the paint to grab onto.
This is because paint molecules need something to bond to in order to maintain their adhesion.
To create this texture, lightly sand the pumpkin with a very fine-grit sandpaper.
This will create more surface area for the paint to bond to.
Alternatively, you can apply a light coat of shellac or primer, which will also provide a better base for the paint to adhere to.
Additionally, use acrylic paint specifically designed for outdoor use to ensure that the paint will stick to the pumpkin and won’t peel off easily.
When applying the paint, use even, light brush strokes.
If you’re using spray paint, spray from a distance and in light, even coats.
With these steps, your paint should stick to your pumpkin and create the perfect masterpiece.
How Do You Set Paint On A Pumpkin?
Painting a pumpkin is a great way to get creative this Halloween! Whether you’re looking for something spooky, funny, or just plain silly, it’s an easy and fun way to add some personalization to your jack-o-lantern.
To get started, you’ll need acrylic paints, brushes, and a sealer that are suitable for pumpkins.
Begin by cleaning the pumpkin with a damp cloth, then create your design with either a stencil or freehand.
Once you’re ready to start painting, use thin layers of paint, allowing each one to dry before adding a new one.
Start with lighter colors and finish with darker ones.
When you’re done, use a sealer to protect the paint from the elements.
Finally, add any finishing touches you’d like, like glitter, gems, or sequins.
With just a few supplies and some creativity, you can turn an ordinary pumpkin into a beautiful work of art!
Will Hairspray Keep Paint On Pumpkin?

Using hairspray to adhere paint to a pumpkin may seem like an ideal solution, but it’s actually not a good idea.
Hairspray is mostly composed of aerosolized alcohols and oils, making it too wet for adhering paint and causing it to run, making it hard to create an even surface.
Furthermore, it can be difficult to remove the hairspray from the pumpkin’s surface if you want to repaint or remove the paint altogether.
A better option is to use a sealer specifically designed for pumpkins.
It will create a strong bond between the pumpkin and the paint, helping it stay in place for a longer time.
Moreover, the sealer will protect the pumpkin from damage and fading, making it last even longer.
To use the sealer, apply it after painting the pumpkin and make sure the paint is completely dry before doing so.
Follow the instructions on the package to finish the job and enjoy your beautiful design that will last for years to come.
What Is The Best Sealant For Painted Pumpkins?
When it comes to preserving the beauty of painted pumpkins, the best sealant to use is a spray sealant specially made for outdoor surfaces.
This will not only help protect the paint from moisture and UV damage, but will also keep the pumpkin looking vibrant for years.
Before sealing, ensure that the paint has completely dried.
If it has been left out in the sun, give it a few days before sealing.
When ready, lightly mist the entire pumpkin with the sealant, making sure to coat all painted surfaces.
Allow the sealant to dry for about 20 minutes, then go back and lightly mist the pumpkin again.
For long-term protection, it is recommended to reapply the sealant once a year, particularly during the fall season.
However, it is important to remember that the sealant should never be applied directly on the painted surfaces, even though it is made for outdoor use.
Overall, spray sealants designed for outdoor surfaces are the best option for painted pumpkins.
With this type of sealant, you can be sure that the paint will be well-protected from moisture and UV damage, keeping the pumpkin looking vibrant for years.
How Do You Make Painted Pumpkins Last Longer?
If you want to make your painted pumpkins last longer, there are few techniques you can try.
Start by selecting a good quality pumpkin with a firm, unblemished skin.
Make sure to clean the pumpkin thoroughly before painting.
Use paint designed for outdoor use and a sealer or varnish to provide extra protection.
Finally, store the pumpkin in a cool, well-ventilated area away from direct sunlight.
With these tips, you can enjoy your painted pumpkin for many years.
Can You Spray Hairspray On A Painted Pumpkin?

No, you should not spray hairspray on a painted pumpkin.
The chemicals in hairspray can react with the paint, causing it to chip, crack, and even dissolve.
This will ruin the pumpkin’s design and make it more vulnerable to rot and decay.
It is best to use a sealant or a clear coat of spray paint instead.
These products are specifically designed to protect the pumpkin from the elements and will help keep the paint from fading, cracking, or chipping.
Additionally, they will help to protect against mold and mildew.
Therefore, it is highly recommended to use a sealant or clear coat of spray paint on a painted pumpkin instead of hairspray.
Final Thoughts
With this guide in hand, you’re now ready to paint your pumpkins and create a one-of-a-kind piece of art that will stand out this fall.
Whether you choose to use acrylic paints, spray paint, or tempera paint, you can use these tips and tricks to make sure your masterpiece looks perfect.
So get out there, grab some paint, and start creating!